varify_success and varify_error
In short
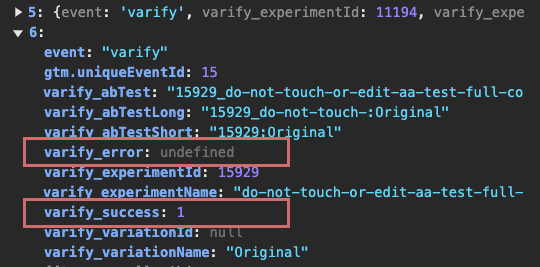
varify_success and varify_error are two parameters that are used when playing the variant in the varify event are available in the data layer. This parameter information can be sent to GA4 in the same way as the varify_abTestShort parameter in order to obtain information about successful and faulty playouts.
Where can I find the parameters
The varify_succes and varify_error parameters are passed to the varify event in the DataLayer along with a number of other parameters. You may also recognize the varify_abTestShort parameter that we send to GA4 in order to be able to assign the users to the experiments and variants.
Why send the information to GA4?
You can send the information from these parameters to GA4 and create your own metric, for example to obtain a key figure for successful or unsuccessful experiment playouts.
We'll show you how.
Send error and success parameters to GA4
To be able to send the parameters to GA4, you can create a new GTM variable for each parameter and send it to GA4 via the existing Varify Analytics tag. Simply follow these steps.
Step 1: Create parameters as variables
Go to your Google Tag Manager container and click on Variable. Then create a new data layer variable: New > Variable configuration > Data layer variable
Now enter the following values:
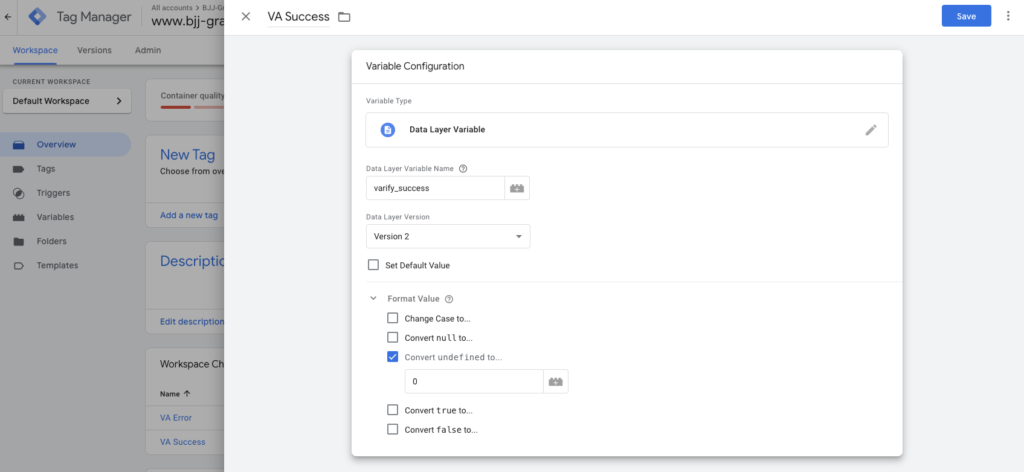
Varify Success Variable:
- Name the variable at the top left: VA Success
- DataLayer Variable Name: varify_success (note spelling)
- Format Value: Convert undefined to...: 0
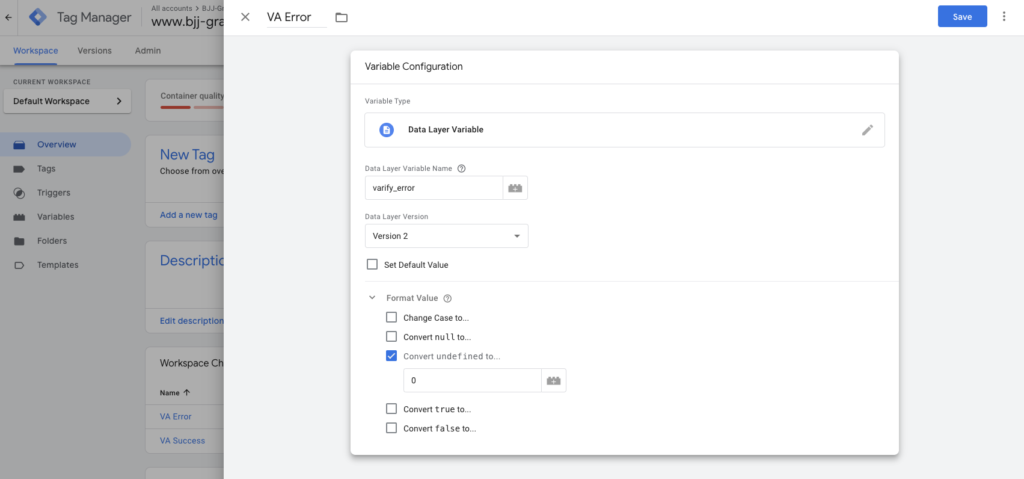
Varify Error Variable:
- Name the variable at the top left: VA Error
- DataLayer Variable Name: varify_error (note spelling)
- Format Value: Convert undefined to...: 0
Step 2: Add variables to the Varify Tracking Linker Tag
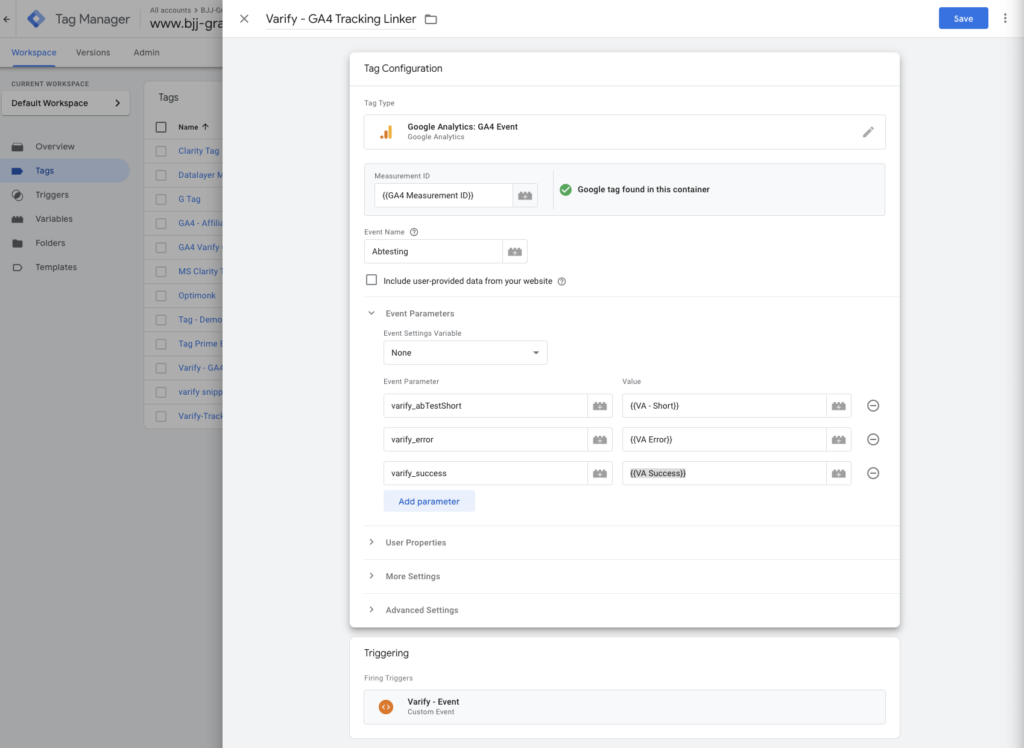
Add the two created variables to your Varify Tracking Linker Tag as additional parameters. You created this tag in your GTM setup (see integration via Google Tag Manager)
-
go to Tags and open the Varify Tracking Linker
-
Double-click „Add parameter„
-
enter the name of the parameter as the event parameter (varify_error and varify_success)
-
add the corresponding variable as the value ({{VA Error}} and {{VA Success}})
-
save the customized tag
Step 3: Publish the customized GTM container
Publish the customized GTM container by clicking on "Publish" in the top right-hand corner.
Create parameters in GA4 as custom metric
To be able to use the sent parameters in GA4 as a metric, they should be created as a custom metric.
To do this, go to your GA4 property and click on the admin area at the bottom left (gear icon). Then navigate to user-defined definitions and click on the "User-defined metrics" tab.
Now click on the blue button "Create custom metric" and create a new metric for varify_success and varify_error.
Enter the following values:
- Metric Name: „varify_success“ or „varify_error“
- Event Parameter: „varify_success“ or „varify_error“
- Unit of measurement: Standard
- Save the metrics
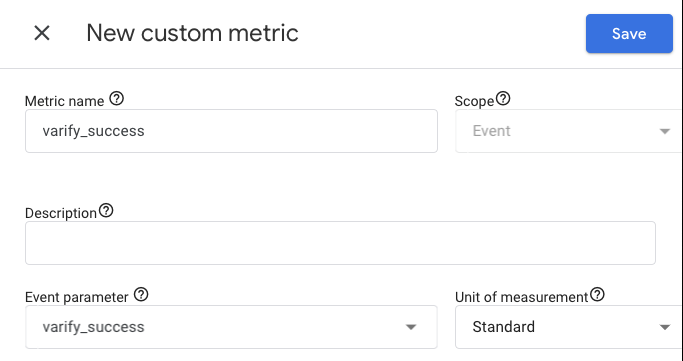
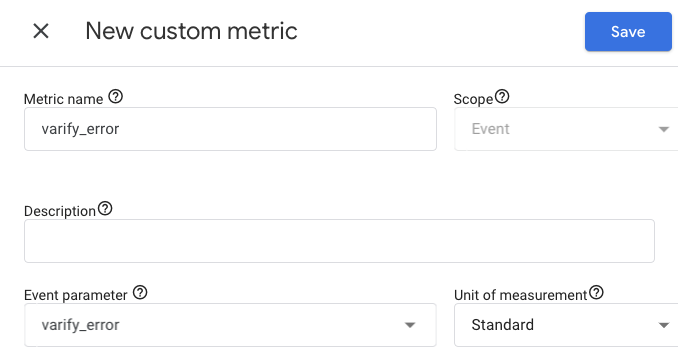
As soon as you have created the two metrics, they collect data and you can use them as metrics in your reports.