Tracking setup: manual GTM with user consent
In short
At Tracking Setup Wizard you have the option of setting up manually via the Google Tag Manager (GTM) to be carried out. This requires adjustments to the GTM so that Experiment data an GA4 be sent.
These instructions will show you step by step how to set up the Google Tag Manager set up correctly.
Step-by-Step Tutorial
Setting up the Google Tag Manager for Varify Tracking with user consent
Tracking Setup Wizard setting
If you are in the Tracking Setup Wizard manual analytics integration via the Google Tag Manager (GTM) additional adjustments are required in the GTM. Without these adjustments, no tracking events are sent to Google Analytics sent.
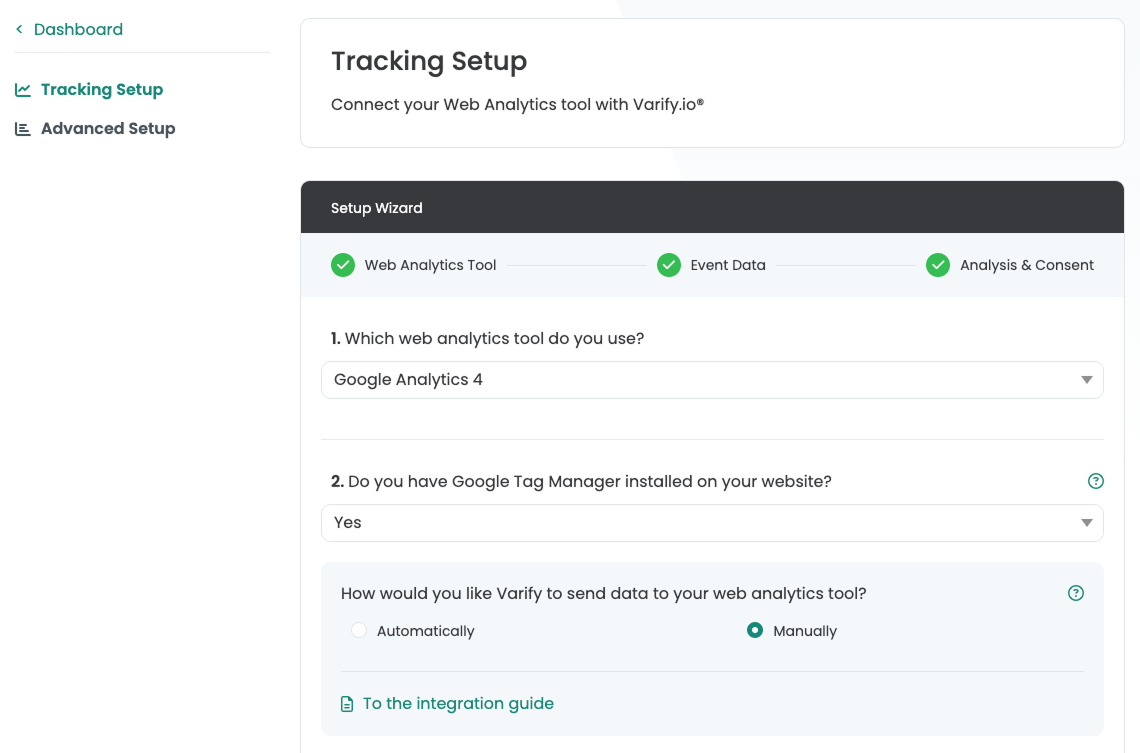
Setting up the Google Tag Manager
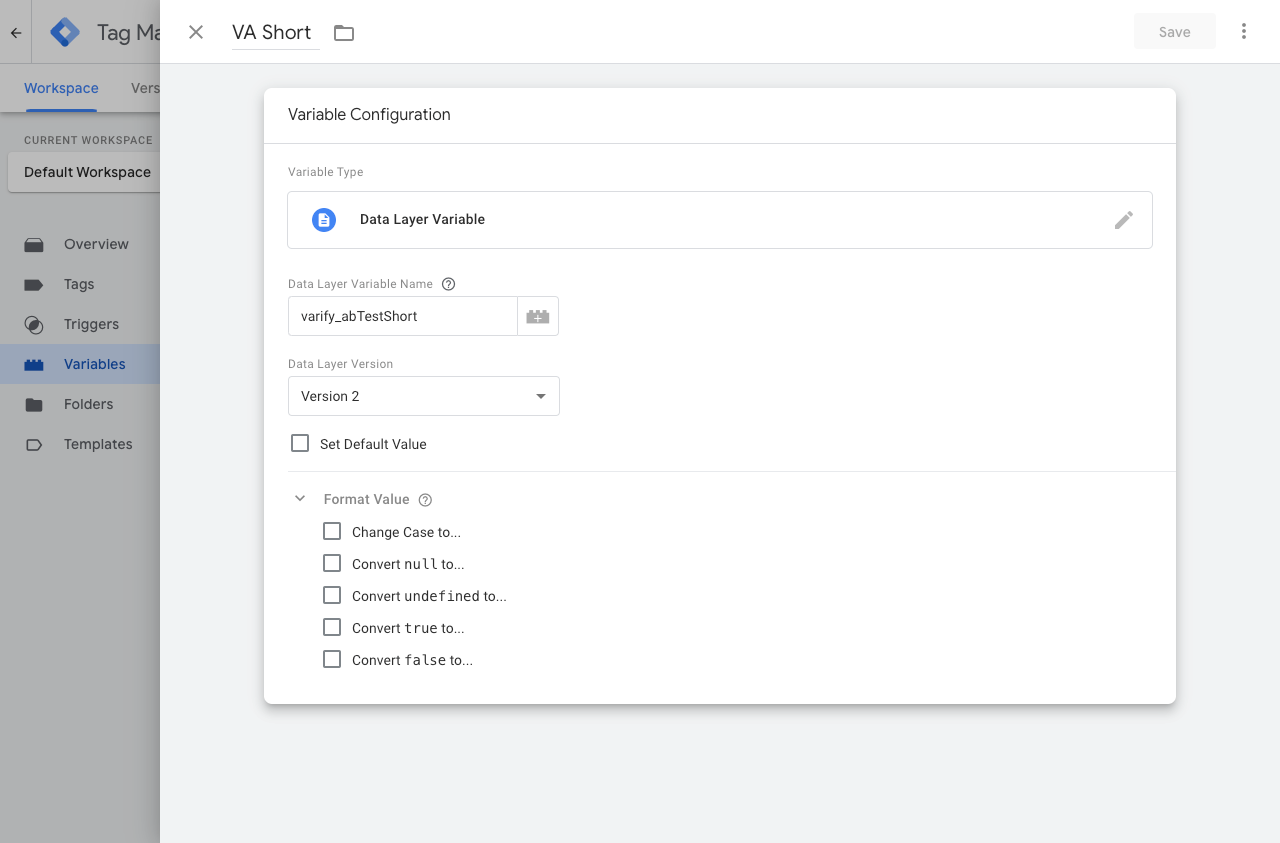
1. creation of a new data layer variable (VA Short)
This variable is used to pass on the information about the variant assignment of the A/B test.
This is how it works:
- Create a new variable: Googel Tag Manager > "Variables" > "New"
- Variable type -> "Data Layer Variable"
- Data Layer Variable Name ->
varify_abTestShort(spelling obligatory) - Name the variable -> VA Short
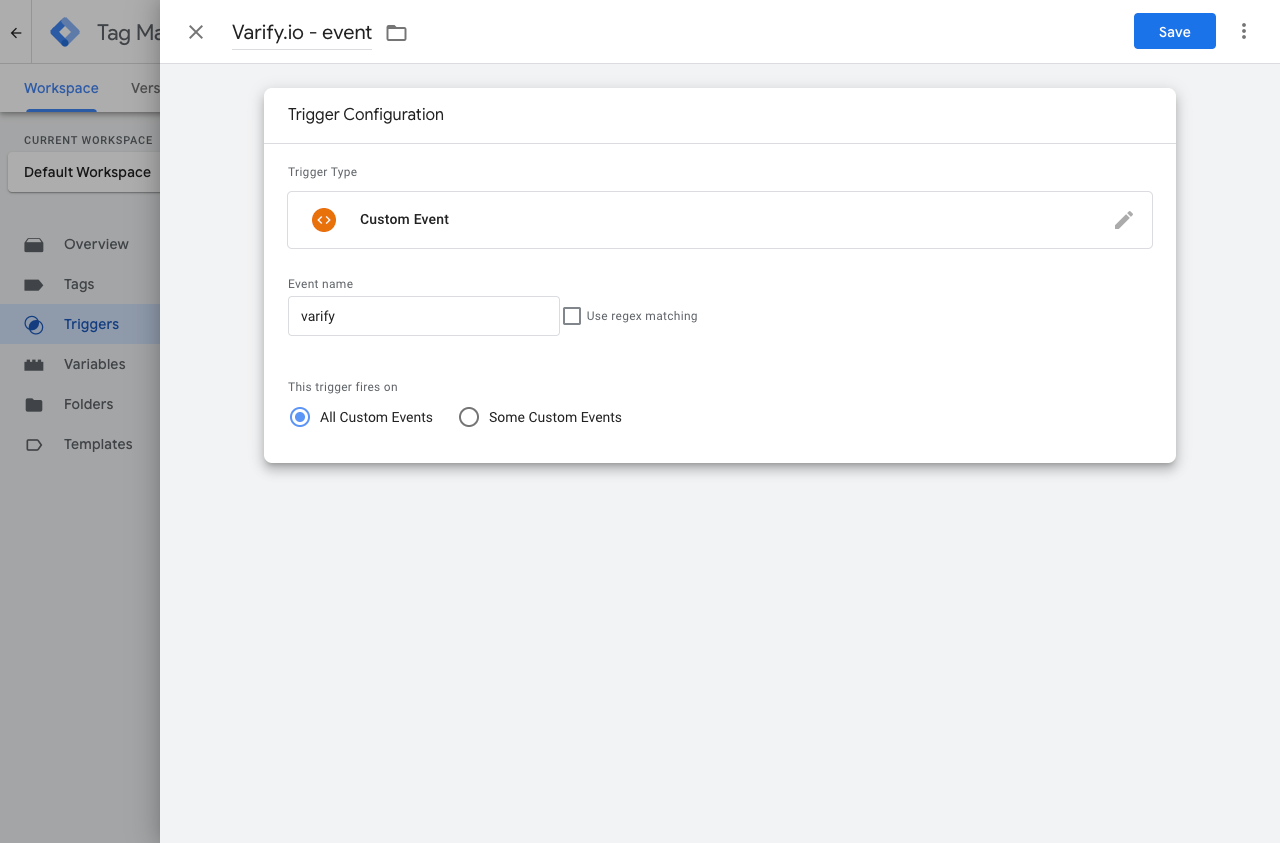
2. create a new trigger (Varify.io - event)
The trigger is triggered as soon as Varify pushes events into the DataLayer. This trigger initiates a tag that sends the data to Google Analytics 4.
This is how it works:
- Create a new trigger: Googel Tag Manager > "Triggers" > "New"
- Trigger Name: „Varify.io – event”
- Trigger type: "User-defined event"
- Event name:
varify(spelling obligatory)
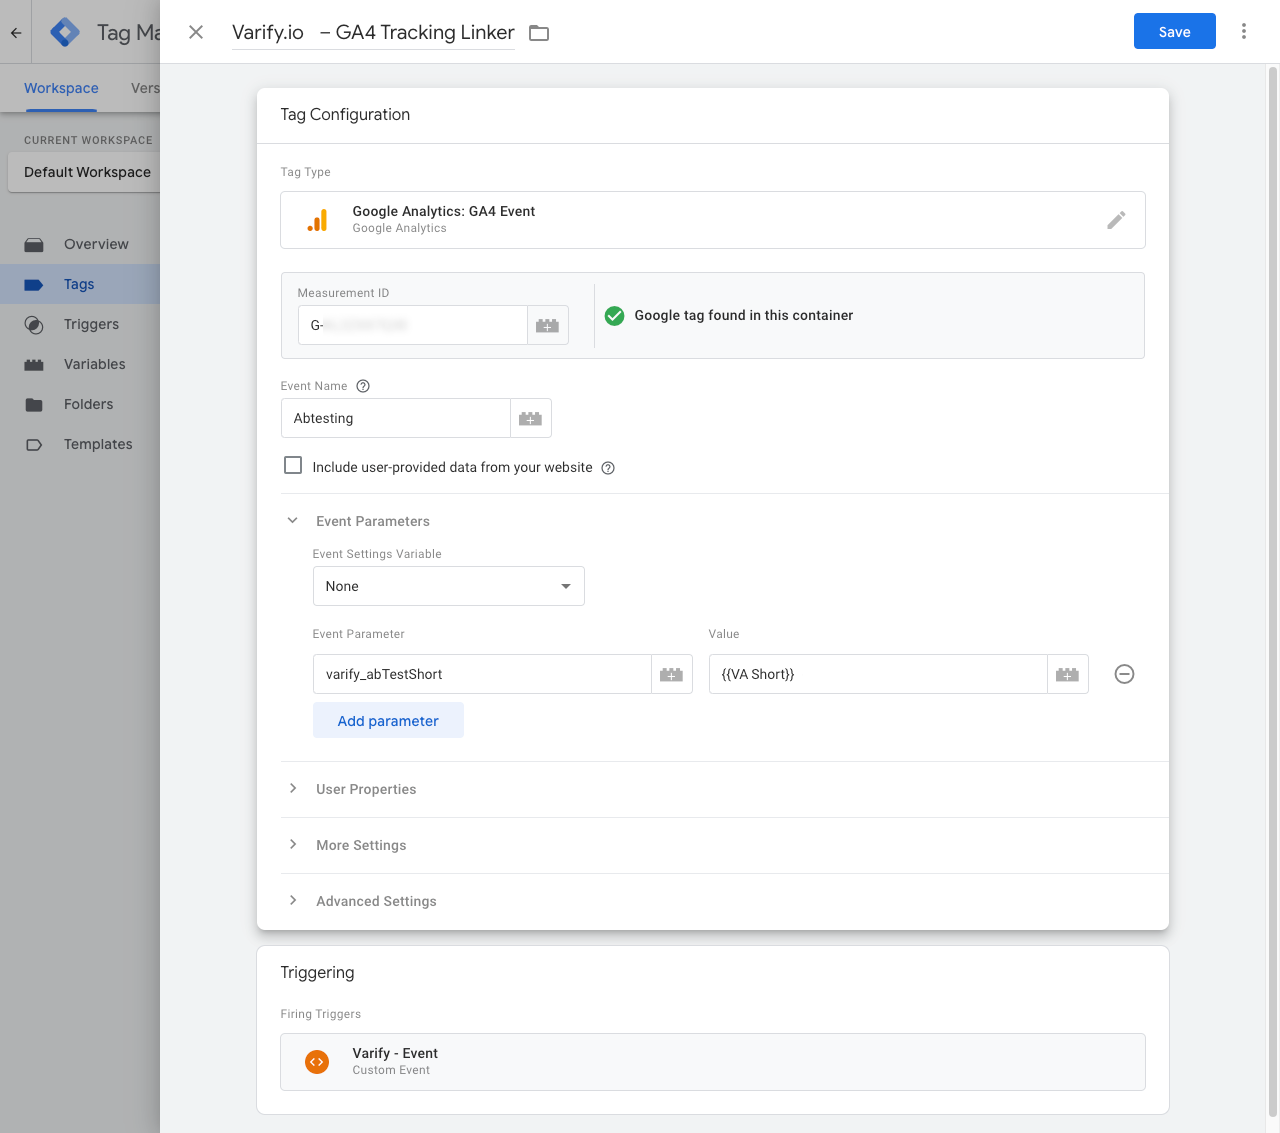
3. creation of a new GTM tag (Varify.io - GA4 Tracking Linker)
Tags are code snippets that send the values stored in the variables to your analytics tool, such as Google Analytics. Now create a sochles tag to send the values of the created variable to Google Analytics.
This is how it works:
- Create a new variable: Googel Tag Manager > "Tags" > "New"
- Tag Type: „Google Analytics: GA4 Event“
- Name of the tag: "Varify.io - GA4 Tracking Linker"
- Measurement ID: The measurement ID of your GA4 property
- Event name: e.g. "Abtesting"
- Parameter name:
varify_abTestShort(Mandatory spelling) - Values:
{{VA Short}}(The variable created in step 1) - Trigger: "Varify.io - event" (The trigger created in step 2)
4. start tracking on activation event
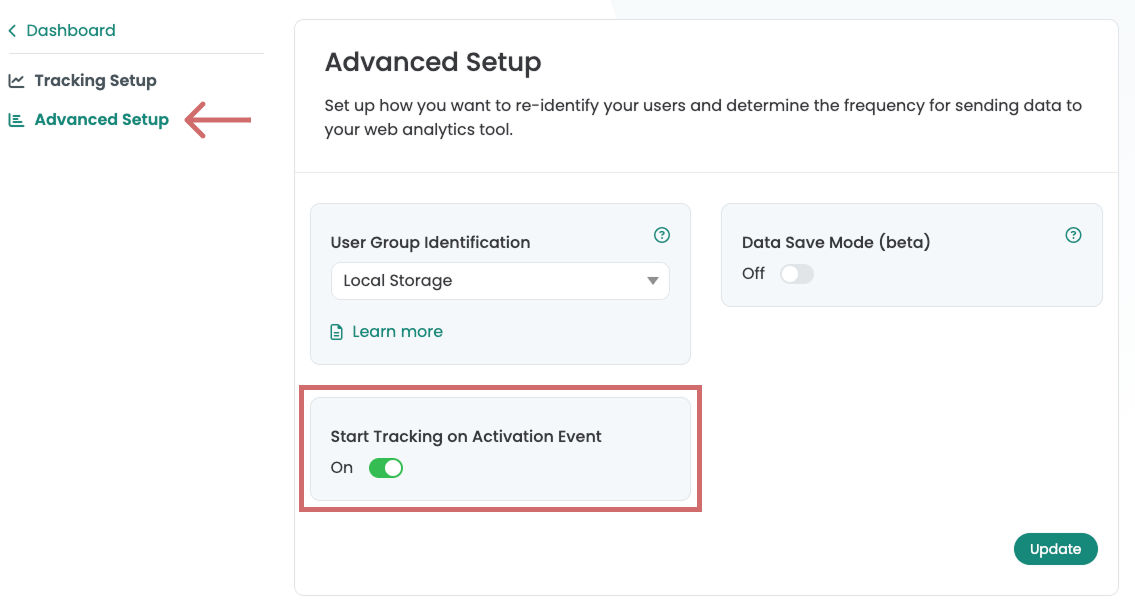
Under Advanced Setup you will find the setting Start Tracking on Activation Eventwhich activated by default is. This setting separates the display of variants from tracking.
Varify tracking events are only pushed into the data layer when a specific Activate Tracking Script has been executed. This ensures that the events are only executed after a complete GA4 configuration be sent, whereby "Not Set" sessions be prevented.
If the GA4 configuration is also bound to a user consent, Varify events are only fired with user consent.
Important: An additional HTML tag must be created, which is fired after the GA4 configuration
-> see steps 5 & 6
5. create a new custom HTML tag in GTM
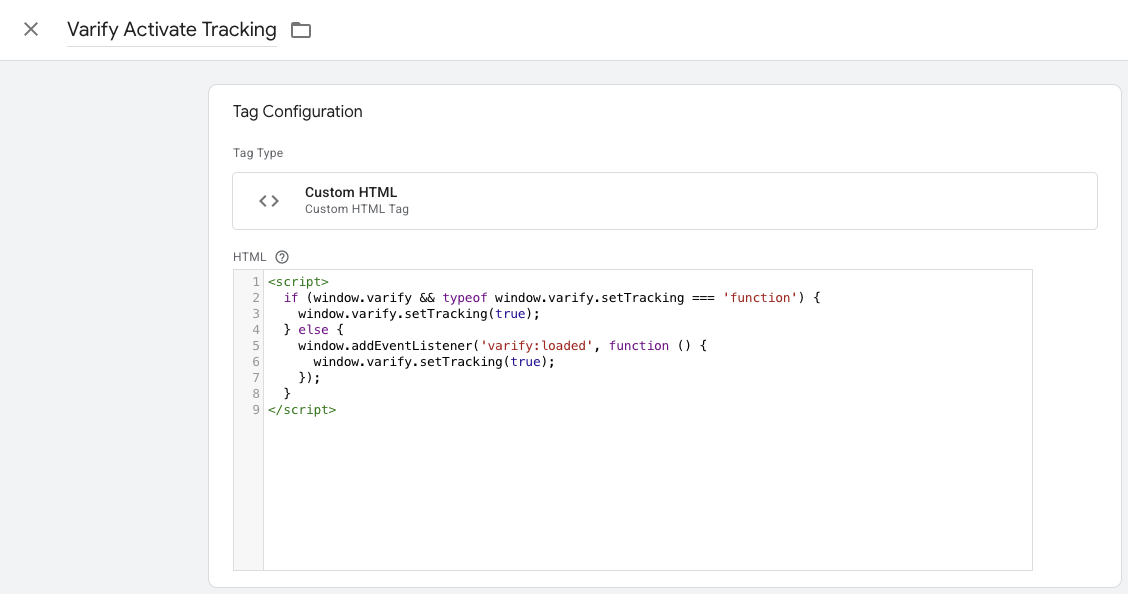
- Go to Tags in the Google Tag Manager and click on New. Now create a new custom HTML tag here.
- Name the tag: "Varify Activate Tracking"
- Paste the following code into the HTML field:
- Save the tag. Confirm that the day without trigger is to be saved.
<script>
  if (window.varify && typeof window.varify.setTracking === 'function') {
    window.varify.setTracking(true);
  } else {
    window.addEventListener('varify:loaded', function () {
      window.varify.setTracking(true);
    });
  }
</script>
We have been using an updated Activate Tracking Script since 29.10.2025.
However, all previously implemented scripts remain valid and continue to function without any adjustments.
6. customize Google Tag configuration tag
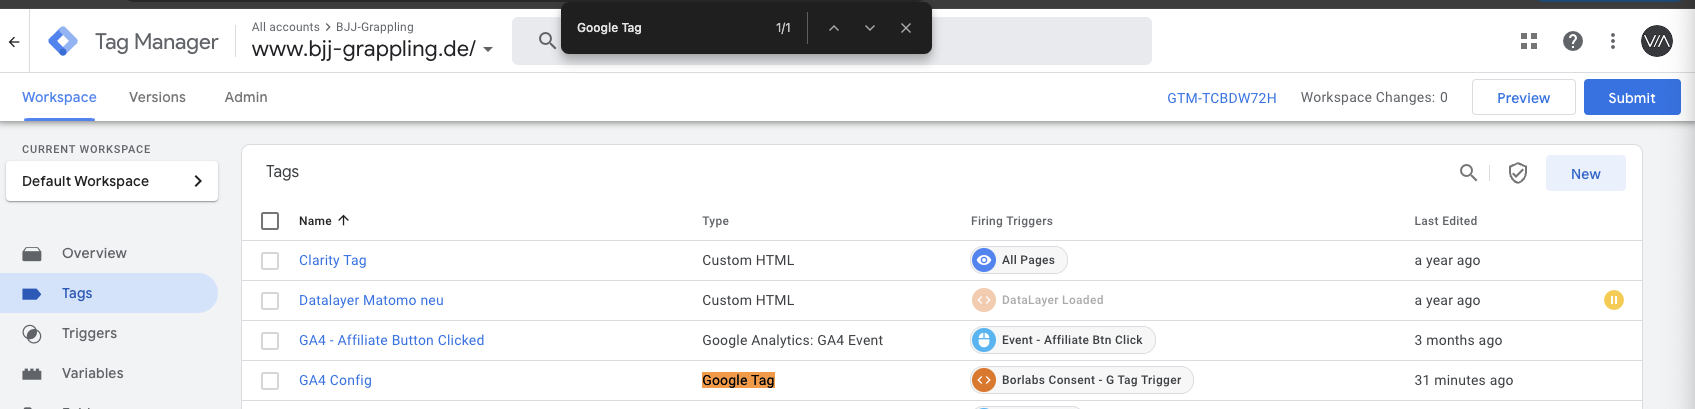
- Now go to your GA4 configuration tag and open it. Note: The easiest way to find it is to navigate to your tags and search for "Google Tag" with Ctrl+F
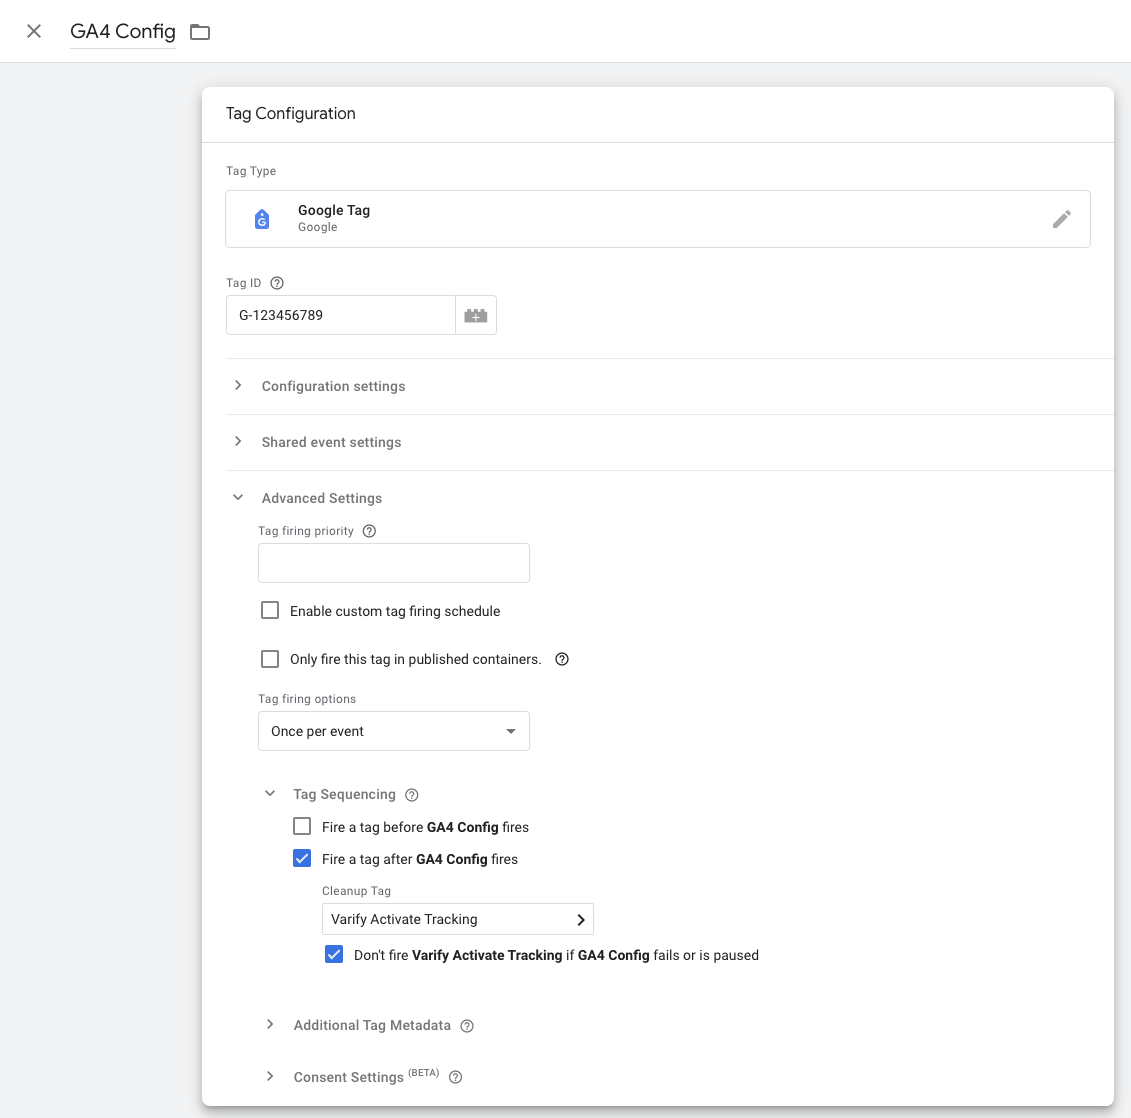
- Click in the Tag Configuration area and select Advanced Settings and Tag Sequencing.
-
- now click on "Fire a tag after GA4 Config (The GA4 config tag) fires"
- Select the Varify Active Tracking Tag you have just created.
- Check the box below that says „Don’t fire” Varify Activate Tracking if GA4 Config “fails or is paused"
- Save the tag customization
7. publish GTM Container
To ensure that your adjustments in Google Tag Manager also work on your website, it is important to publish the changes.
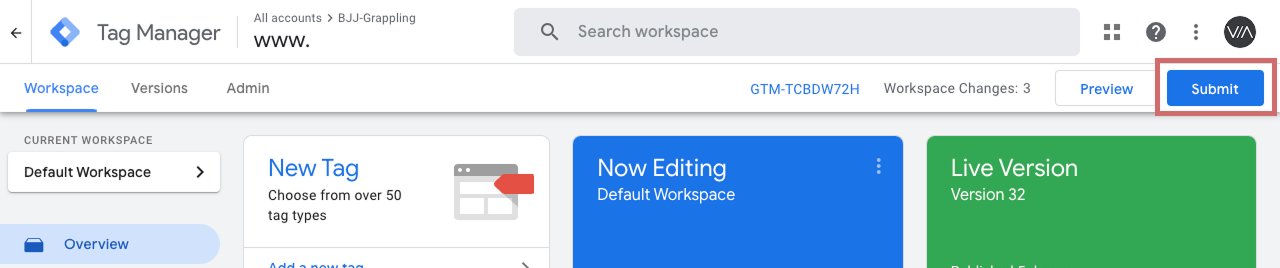
To do this, go to "Overview" in the Tag Manager on the left. Here you can see an overview of all the elements you have just created.
To publish, click on the blue "Publish" button at the top right and confirm. The tag is now live and sends the data to your Google Analytics.
Display the A/B test data in Varify.io
Check the tracking setup with an A/A test: Start an A/A test and check the tracking
Display the A/B test data in Varify.io
With the Varify.io Google Analytics 4 Connection, you can easily display your results directly in your Varify.io dashboard. You can find out how to do this here: To the result evaluation in Varify.io
Viewing the A/B test data in GA4
You can analyze the data of the variations of your A/B test in GA4 with the Explorative Data Analysis. You can find more information here: To evaluate the results in GA4