Integration via Google Tag Manager - Server Side
In short
Server-side tracking with Google Tag Manager (Server GTM) enables reliable data collection by sending tracking data to a dedicated tracking server rather than processing it directly in the user's browser. This improves data quality, minimizes ad blocker restrictions and reduces website loading times.
In contrast to client-side tracking, server-side tracking offers more control over the collected data and increases data security. By using a data layer, A/B testing data can be forwarded precisely and used for detailed analyses in GA4.
This guide shows how GA4 and your A/B testing data can be efficiently collected via Server GTM and integrated into GA4.
Advantages of GA4 Server-Side Tracking
GA4 Server-Side Tracking offers numerous advantages over conventional Client-Side Tracking:
- Higher data quality - Fewer restrictions due to ad blockers and browser rules.
- More accurate attribution - More conversion data thanks to more reliable recording.
- Better data security - Encrypted transmission minimizes the risk of manipulation.
- Data protection & anonymization - Sensitive data can be anonymized before being passed on.
- Compliance with regulations - Full control over data storage and processing.
How to set up GA4 server-side tracking with Varify.io
Implementation of GA4 server-side tracking
To carry out the following steps, the following conditions must be met:
- You need a "normal" client-side Google Tag Manager container that is already integrated on the website.
- a Server-Side Google Tag Manager (Server GTM) must already exist. Without an existing server GTM instance, the implementation of GA4 Server-Side Tracking is not possible. If your company does not yet have an instance, the provider is Stape.iorecommended. The setup does not take long and is described very simply.
Step 1: Connect Google Analytics 4 to the GTM server
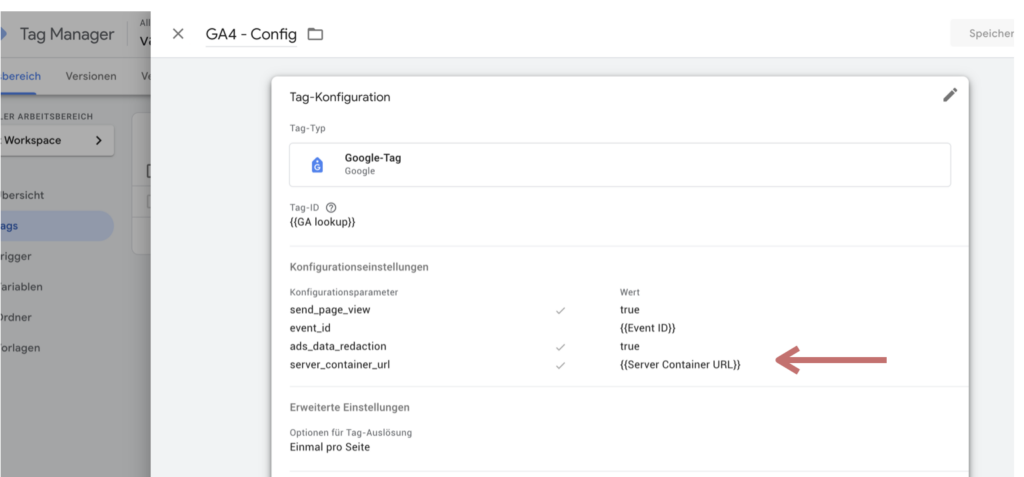
If GA4 is already in the Web GTM container is set up, it is sufficient to make the following adjustment:
- Add server container URL - Go to the Tag settings in GA4 and add the parameter server_container_url to your website.
- Enter tagging server URL - Enter the URL of your tagging server as the value.
This forwards the GA4 data to the server GTM. You can see a parameter in the screenshot, but you can also enter the URL directly.
Step 2: Create a client in the server GTM
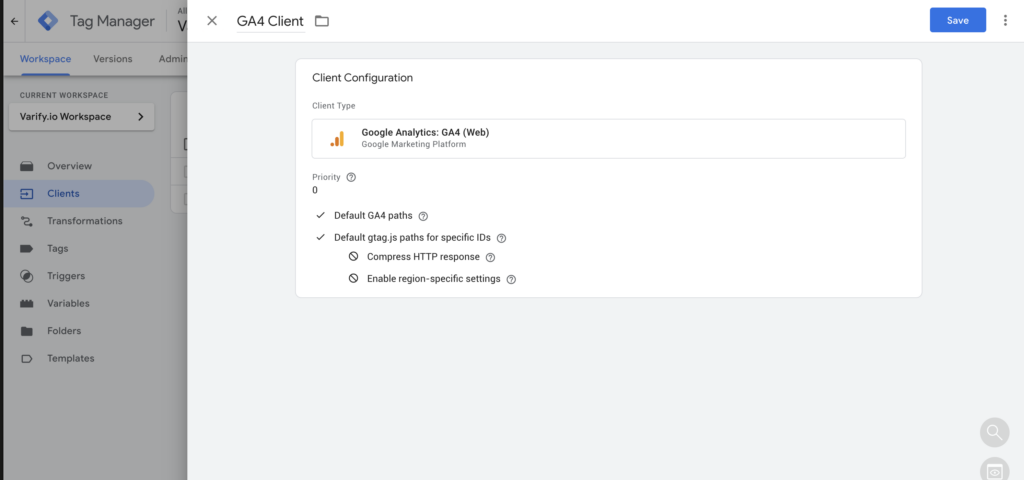
Open your server GTM container and create a GA4 client. You only need to do this if this client does not yet exist.
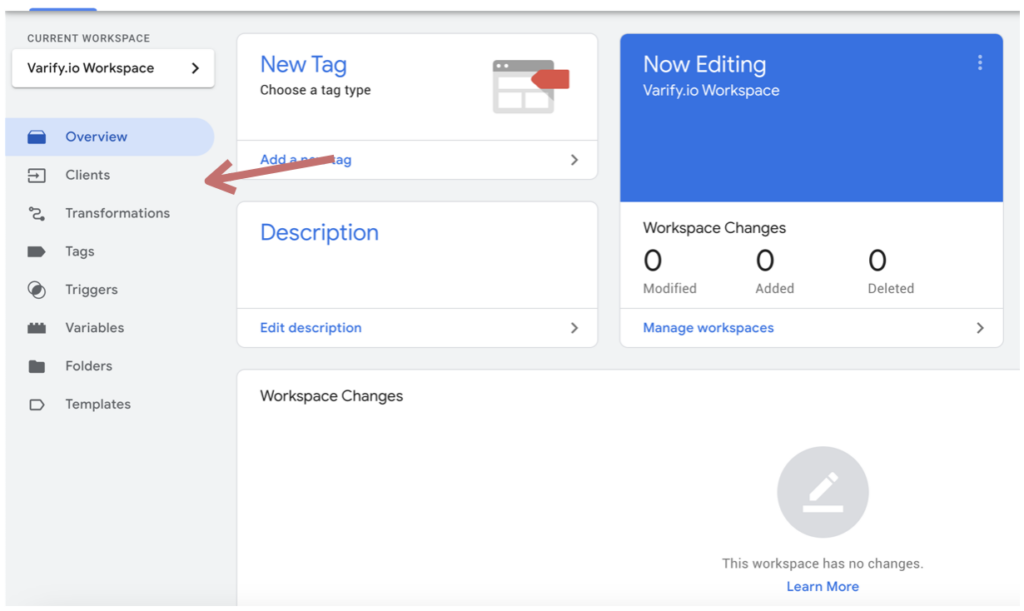
- Open clients area - In the server GTM container, navigate to the Clients-section.
- Create a new client - Click on Create a new client.
- Select client type - Choose Google Analytics: GA4 (Web) as client type.
- Name client - Enter a name for the client.
- Save - Click on Saveto complete the setup.
Step 3: Create GA4 tag in the server GTM container
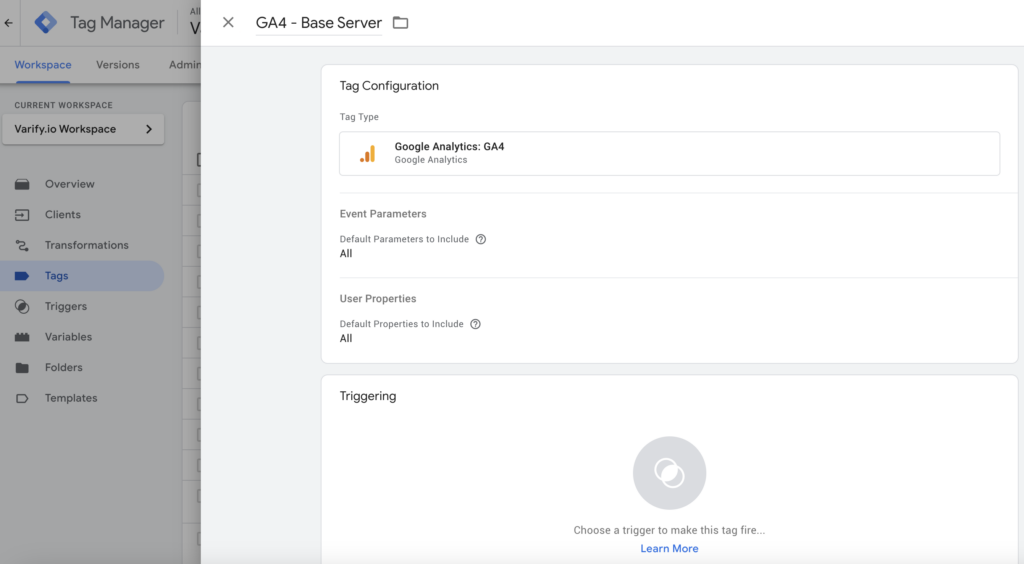
- Create new tag - Open the Server GTM container and navigate to the Tags section.
- Select tag type - Click on New tag and select Google Analytics: GA4 as tag type.
- Finalize configuration - Adjust the settings as required and save the tag.
With this procedure, all GA4 data is processed by the server. For the A/B testing data, it is particularly important that the parameters are also included.
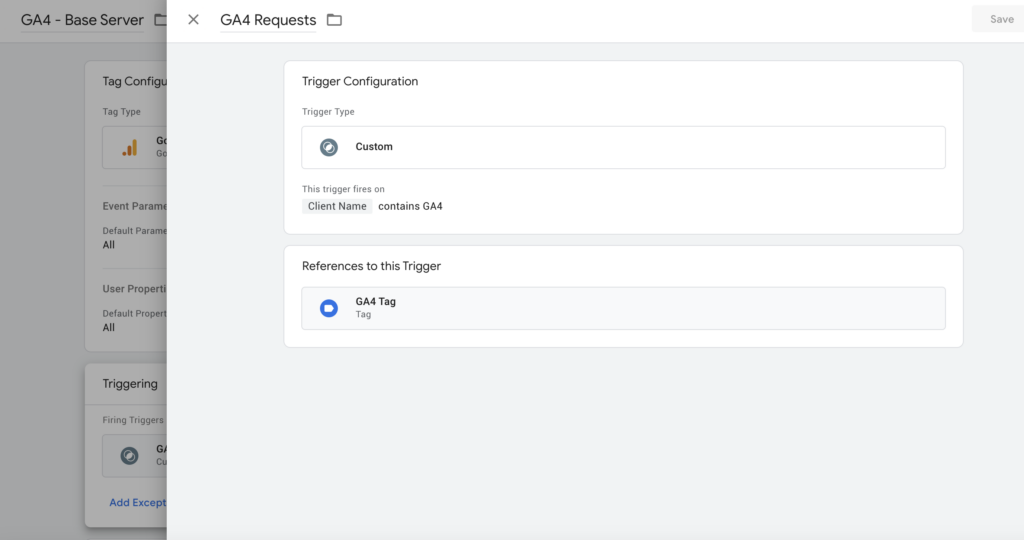
Step 4: Configure trigger for GA4 tag in server GTM
- Open triggering - In the GA4 tag created, click on Triggering.
- Create new trigger - Choose New trigger and set the Trigger type to User-defined.
- Set condition - Configure the trigger so that it is triggered when the Client name = GA4 (or the name you have chosen for the GA4 client).
- Save - Confirm the settings with Save.
Step 5: Test and publish the setup
- Activate debugging
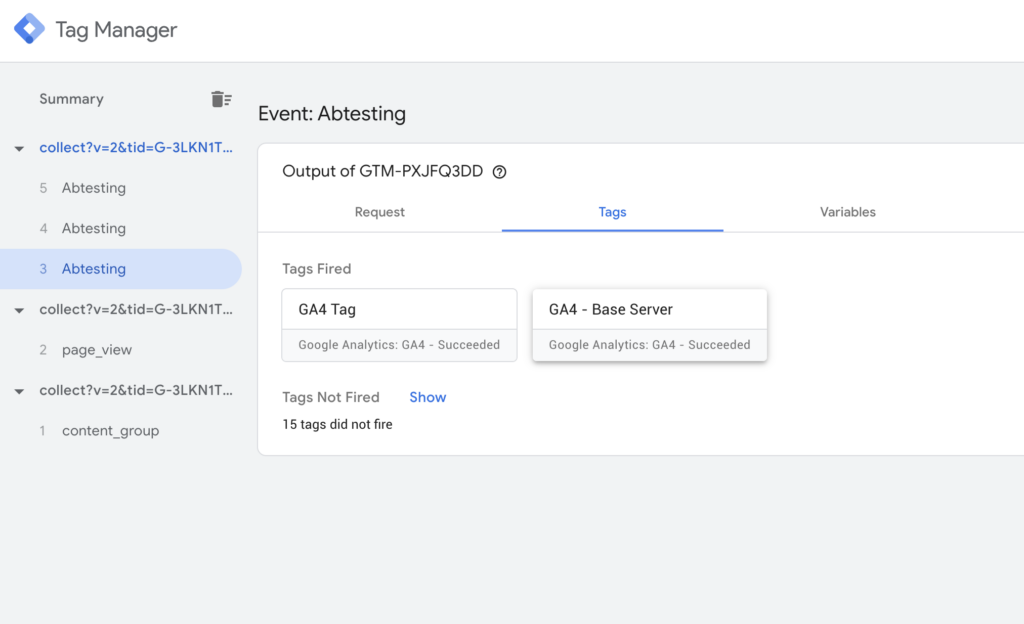
- Open the Preview mode in the Web GTM and Server GTM. Ideally with a URL on which an A/B test is live.
- Check whether GA4 requests in the Server GTM debugger are recorded.
- Troubleshooting
- Ensure that GA4 events are forwarded correctly.
- If no requests appear, check the Server container URL and the Trigger settings.
- Publish changes
- If everything works, publish the updated Server and web GTM container. For A/B testing, the A/B testing events are particularly important and that the previously created GA4 tag fires.
Congratulations! You are now tracking your GA4 data and A/B tests on the server side.